Search This Blog
Thursday, October 25, 2012
Class #7 assignment #1
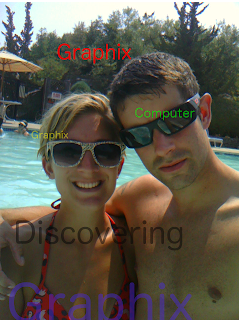 I used the text tool along with the transparency feature to create five different layers of texts and transparency.
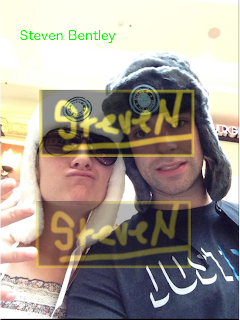 In this image I learned about transparency. I used an old photo and then pasted in a few images i was previously working on and proceeded to play around with the transparency slider with each of my layers.
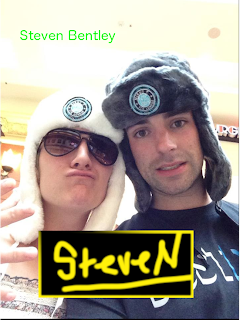 In this exercise i learned how to paste into an image. Instead of just a copy and paste, paste into allows me to move around and adjust differnt opionts in my photo.
Midterm #7
For midterm 7 i copied the circle image from our textbook then in gimp I cropped the image using the circle ellipse tool, After that I copied and pasted it to my Obama picture and finally resized it to fit over his eyes.
This is a midterm exercise from the Immersive Education course that I am taking at Boston College. This course is called Discovering Computer Graphics. For details, visit the immersive BC portal at http://immersiveeducation.org/@/bc
Midterm #8
Before
After
For midterm 8 I used the smudge and blemish tool to remove my five oclock shadow and my smile. It definitly can take some getting used to in order to get a realistic looking image.
Monday, October 22, 2012
Midterm #10
For midterm 10 I used the same auto shape feture as in midterm 9 but in this one instead of filling in the shape with just a color i used the texture box. This allowed me to make my roof have a more realistic look and for my house to take on a brick like appearence. Finally I used the free draw tool and expierimented around with drawing my name.
MSW LINK
https://wfs.bc.edu/xythoswfs/webui/_xy-19659178_1-t_vHWgxyW8
MSW LINK
https://wfs.bc.edu/xythoswfs/webui/_xy-19659178_1-t_vHWgxyW8
Midterm #9
For Midterm 9 I created a few differnt shapes in microsoft word 2010. I then added arrows from the auto draw tool and used the text tool to then write in the shapes.
MSW LINK
Thursday, October 18, 2012
Wednesday, October 17, 2012
Tuesday, October 16, 2012
Midterm #5
For this photo I saved it as a jpg and when the dialog box opened I just simply selected progressive.
I used the same photo down here expect when i went to save a chose png and then simply checked Interlaced Adam7.
Midterm #6a and 6b
I opened a new file in Gimp and selected the transparency tool. I then created a new image dialog box. Then I added a new layer and selected the white box under layer type. I also adjusted the opacity of the white layer so that I could see the bottom two layers. I downloaded and opened the tux image and copied the image to my clipboard. Then I added a new layer and selected transparency as the layer fill type. I pasted the tux photo into the new layer and anchored it. Then I moved the Tux layer down until it appeared behind the text. Then i deleted the correct layer and saved the final image as a JPG file.
To createa a text circle I went to File create logos and selected text circle. When the dialog box opened I entered my name in the text box. Next I added a new layer, with white as the background, and pasted the text into the new layer. I selected the rotate tool, and clicked on the floating text. I increased my rotation to 45 degrees, clicked rotate, then anchored it to the other layer. I repeated the three times increases the angle by 40, Then i Saved the file as a animated GIF .
Class 3 Red Eye Assignment Formats
Here I exported three red eye images in three different formats. I can notice a slight differnce in quality between the jpeg and gif.
Midterm #3
For midterm # 3 I saved the three images in three differnt formats, jpeg,gif and png. File Export and then selet the type of extension you wish to export as.
Thursday, October 4, 2012
Subscribe to:
Comments (Atom)


